Ninja Creami Vanilla Ice Cream Recipe: 4-Ingredient Lighter Base
This ninja creami vanilla ice cream recipe uses just 4 ingredients for a smooth, creamy result every time. No custard, no fuss, ready in 24 hours.
There’s a particular kind of Saturday afternoon in Sydney where the air sits heavy and warm, even in late autumn, and the only thing that makes sense is ice cream. I’d been eyeing the Ninja CREAMi NC300 sitting on my bench for weeks before I finally committed to making a proper ninja creami vanilla ice cream recipe from scratch. Not a store-bought shortcut. Not a half-measure. The real thing, just made a bit lighter and a lot more satisfying than anything I’d been pulling from a tub at Coles.
What surprised me most wasn’t the texture, which is genuinely incredible, almost like soft-serve from a good gelato bar. It was how few ingredients you actually need. Four. That’s it. And yet this ninja creami vanilla ice cream recipe produces something so smooth and clean-tasting that I’ve made it probably six or seven times in the past two months alone.
I’ll admit I was sceptical at first. The machine looks a bit dramatic for what it does, and the 24-hour freeze time felt fussy. But once you taste the result, you understand why people get a bit obsessive about it.
What Makes This Version Worth Making
Honestly, a lot of ninja creami vanilla ice cream recipe versions I’ve seen online lean either too rich (full cream, full sugar) or too thin and icy. This one sits in the middle. The base uses full-fat coconut cream from a tin, which gives body without needing egg yolks or a cooked custard. Jalna full-fat Greek yoghurt adds a gentle tang that keeps the flavour from going flat. Then there’s a small amount of raw caster sugar, just enough to stop the base from freezing solid, and a real vanilla bean, because imitation extract at this level really does taste like it.
The process spins the frozen base in the CREAMi for about two minutes and the result is genuinely creamy. No iciness. No graininess. A clean vanilla hit with a texture you’d pay $9 a scoop for at a proper gelato shop.
There’s also something quite satisfying about knowing exactly what went into it, especially when you’re making it for kids. No additives, no numbers, no mystery stabilisers.
Ingredients
You’ll find everything you need at Woolworths or Coles. The vanilla bean is usually near the baking section, sometimes $4-5 for a small jar of two, which I think is worth it here because the flavour really carries the whole base.
The coconut cream should be full-fat, not the lite version. I use Ayam brand, which is consistently thick and doesn’t split. Make sure you shake or stir it before measuring because the cream and liquid tend to separate in the tin.
For the yoghurt, Jalna full-fat plain Greek is my go-to. It’s thick, it’s a bit tart, and it blends evenly into the base without making it taste “healthy.” More or less any thick plain yoghurt will work, but avoid anything with added sugar or flavouring.
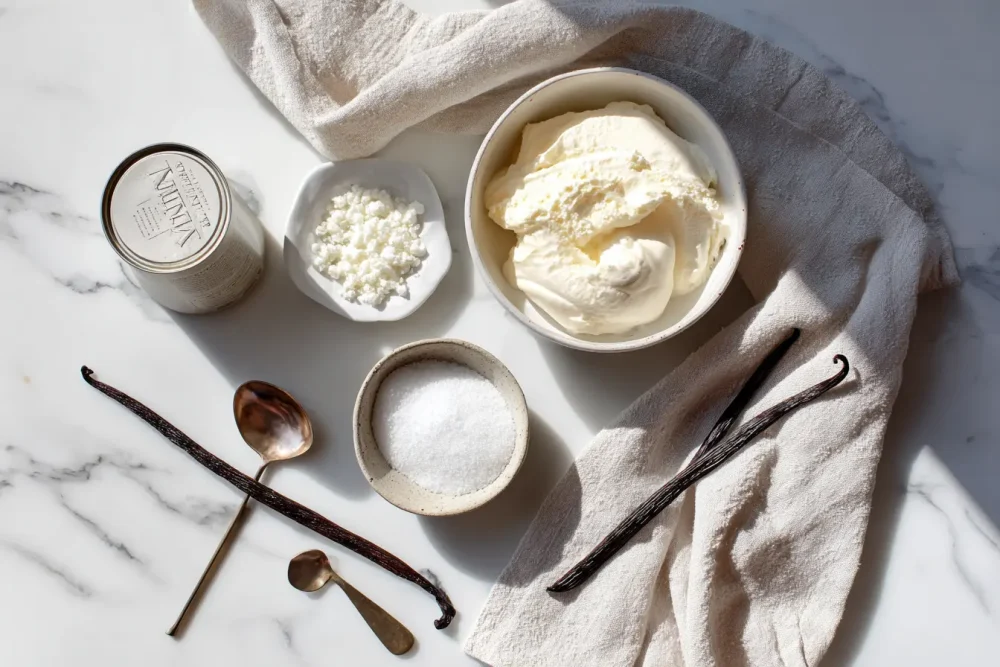
Ingredients list:
- 270ml (1 tin) full-fat coconut cream (Ayam brand recommended)
- 120g (1/2 cup) Jalna full-fat plain Greek yoghurt
- 3 tbsp (45g) raw caster sugar
- 1 vanilla bean, split and scraped (or 1 1/2 tsp good-quality pure vanilla paste)
Optional add-ins (not counted in the 4-ingredient base): a small pinch of fine sea salt lifts the vanilla noticeably. I almost always add it.
For more dessert ideas using a lighter hand with sweetness, take a look at the Cottage Cheese Chocolate Mousse With Chia Seeds on the site, which uses a similar approach.
Step-by-Step Instructions
1. Mix the base
Combine coconut cream, Greek yoghurt, caster sugar, and vanilla in a jug or bowl. Whisk until the sugar has fully dissolved, about 90 seconds. It doesn’t need to be aerated, just smooth and even.
2. Pour and level
Pour the mixture into your Ninja CREAMi pint container up to the max fill line. Do not overfill. Use a spoon to level the surface flat. This matters for even freezing.
3. Freeze for 24 hours
Seal the lid and place the container on a flat shelf in the freezer. Leave it undisturbed for a full 24 hours. Trying to rush this step with 12 hours gives you an icy, grainy result.
4. Process on Ice Cream setting
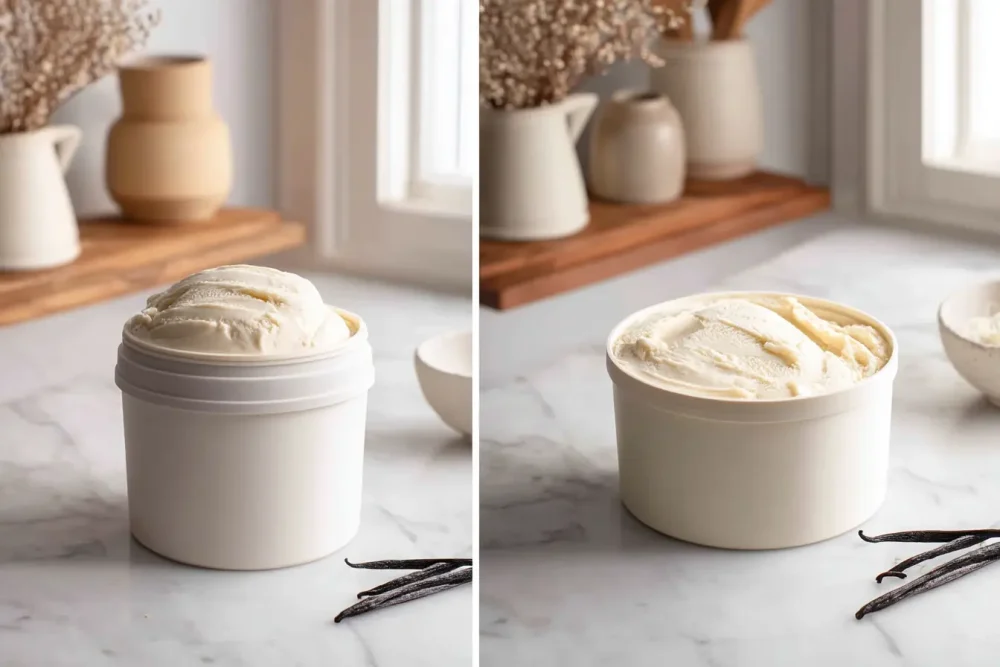
Remove the container from the freezer and let it sit on the bench for 5 minutes to temper slightly. Lock it into the CREAMi outer bowl and process on the Ice Cream function. One full cycle runs about 2 minutes.
5. Check texture and re-spin if needed
Once done, lift the lid and check. If the surface looks a bit crumbly or uneven, run one Re-spin cycle. Usually one is enough. The texture should be smooth and glossy, almost like soft-serve.
6. Serve or return to freezer
Serve immediately for a softer consistency, or return the sealed container to the freezer for 30-40 minutes if you want a firmer scoop.
For a great pairing idea, the Brownie A La Mode Recipe on the site is made for this.
My Take on This Recipe
The first time I tested this ninja creami vanilla ice cream recipe, I used lite coconut cream. Big mistake. The result was thin, icy, and kind of sad. I binned it.
Second attempt I swapped to full-fat coconut cream and dropped the sugar slightly, thinking less would be better. Wrong direction. The base froze too hard and the CREAMi struggled on the first spin, leaving a chalky middle.
Third try was the version I’ve been making ever since. Full-fat coconut cream, 3 tablespoons of sugar, Jalna yoghurt, real vanilla bean, a pinch of salt. It spins smooth in one cycle, it scoops cleanly, and it tastes like something you’d buy, not something you made because the machine was sitting there judging you.
My daughter, who is nine and extremely opinionated about ice cream, ate it without asking what was in it. I’ll take that as a pass.
What I Got Wrong Before Getting It Right
I tested this ninja creami vanilla ice cream recipe probably eight times before landing on something I’d actually serve to guests. Let me save you the wasted pint containers.
Attempt one used a coconut cream and milk kefir base I’d seen floating around online. Sounded interesting. Tasted fine at the mix stage, but after freezing the ninja creami vanilla ice cream recipe produced a slightly sour, fermented edge that overwhelmed the vanilla completely. The CREAMi spun it smooth enough but the flavour was just off. Binned.
Attempt three, I reduced the yoghurt to 60g thinking less dairy would give a cleaner coconut flavour. Instead the base had too much fat and no protein buffer, and after one spin cycle it left a slightly greasy mouthfeel that coated your tongue in a way that wasn’t pleasant.
The one that stung most was attempt six. I warmed the coconut cream slightly to dissolve the sugar faster, then let it cool before adding the yoghurt. Seemed logical. What actually happened was the heat partially cooked the yoghurt proteins when I added it too soon, leaving small white specks throughout the frozen base that didn’t fully spin out. Texture was grainy in patches.
Cold base, fully dissolved sugar, yoghurt added last. That’s the order. Every time.
Tips That Actually Make a Difference
Don’t skip the 5-minute temper before processing. If your freezer runs very cold (below -22°C, which some Australian chest freezers do in summer), the base can be too hard for the blade and you’ll hear the machine strain. Five minutes on the bench is usually enough. If the ninja creami vanilla ice cream recipe base looks frosty on top and you hear resistance in the first seconds of spinning, hit pause, wait another 3 minutes, and try again.
Level the surface before freezing. A domed or uneven top means the blade makes uneven contact on the first pass. I use the back of a soup spoon dragged across the fill line. Takes two seconds and makes a real difference to the final texture of your ninja creami vanilla ice cream recipe.
The Re-spin function is your safety net, not a sign something went wrong with the ninja creami vanilla ice cream recipe. I’d say I use it about half the time, usually when I’ve pulled the container straight from a very cold freezer without tempering. One Re-spin fixes it almost every time.
Vanilla bean paste works just as well as a split bean in this ninja creami vanilla ice cream recipe and is probably a bit more forgiving. I use Heilala brand, which you can find at Harris Farm or order online. Around $12 a bottle but the flavour is noticeably better than the supermarket generic.
For another dessert that gets a lot from good vanilla, the Easy Homemade Banana Pudding Recipe uses it as a base note in a similar way.
Variations Worth Trying
Strawberry swirl version: Once the ninja creami vanilla ice cream recipe has processed and you’ve done one Re-spin if needed, create a well in the centre with a spoon, add 2-3 tablespoons of good-quality strawberry jam or fresh strawberry puree, and run one more Re-spin. The fruit ribbons through rather than fully mixing, giving you a proper swirl effect.
Brown butter vanilla: Before mixing the base, melt 1 tablespoon of Lurpak butter in a small pan until it smells nutty and turns a light golden colour, about 4 minutes. Cool it completely, then whisk into the coconut cream base before adding the yoghurt. It adds a depth to the vanilla that stops the ninja creami vanilla ice cream recipe tasting one-dimensional. I reckon this is the best version for adults.
Coffee vanilla swirl: Add 1 teaspoon of good instant espresso powder dissolved in 1 teaspoon of hot water to half the base before pouring. Pour the plain half into the pint container first, then add the coffee half and drag a skewer through once. You get a marbled result that looks genuinely impressive. For more ideas on the sweeter end, the Banana Pudding Milkshake is worth a look.
How to Serve It
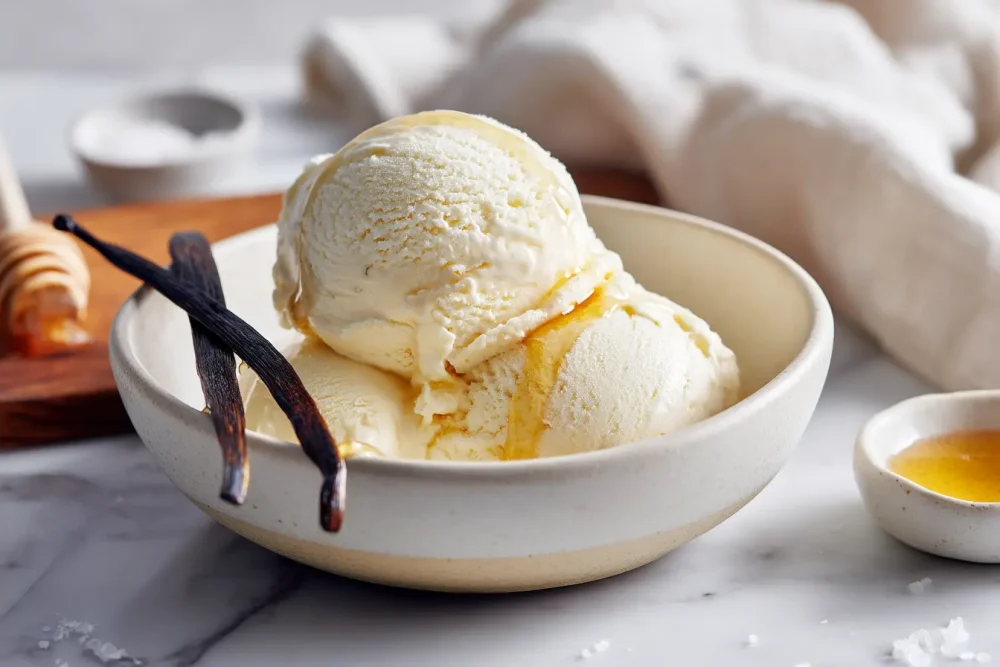
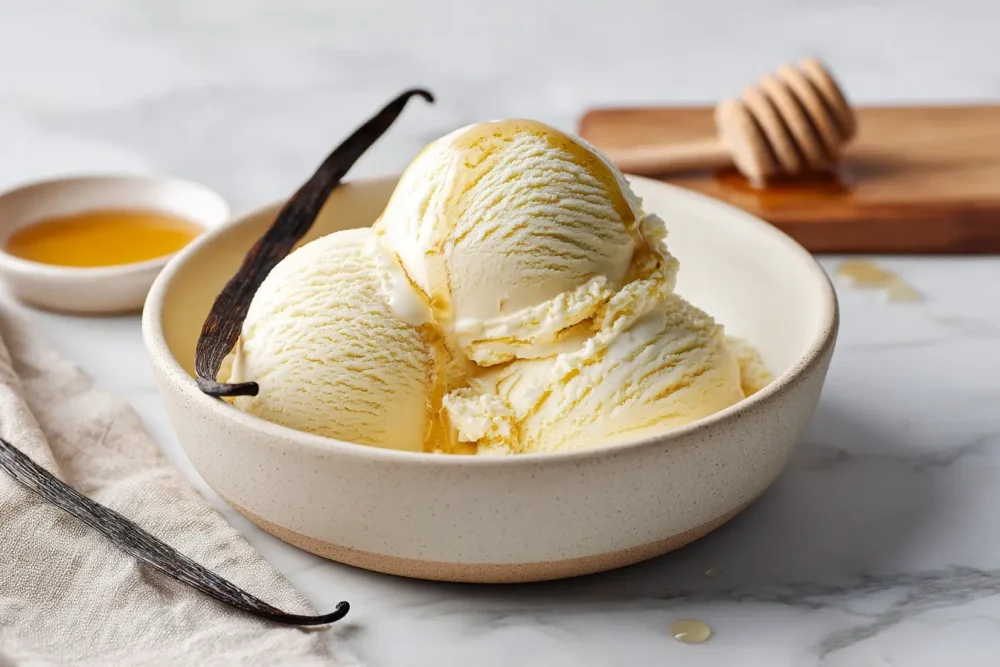
Straight from the CREAMi container with a warm spoon is the most honest way to eat this ninja creami vanilla ice cream recipe. Soft, cold, clean. But if you’re serving it to others, a scoop or two into a chilled ceramic bowl with a drizzle of good honey and a small pinch of flaky salt is genuinely very good.
For a proper dessert, serve the ninja creami vanilla ice cream recipe alongside the Brownie A La Mode, which is practically designed for this pairing. The warm brownie against the cold vanilla is what you want on a hot Sydney evening.
At Christmas (which, yes, is summer here), I’ve served this ninja creami vanilla ice cream recipe alongside a simple stone fruit salad, peaches and nectarines with a squeeze of lime, and it’s become a bit of a tradition at our place.
How I’ve Been Using It Lately
This ninja creami vanilla ice cream recipe is mostly a weeknight thing now. I mix the base on a Sunday afternoon, freeze overnight, and by Monday evening we’ve got ice cream ready in about two minutes of actual effort. My daughter has started requesting it instead of the tub stuff from Coles, which feels like a win. I’ve also started making a double batch and keeping one pint plain vanilla, one with a jam swirl, so there’s always something different in the freezer. The containers stack well and the Ninja CREAMi NC300 handles pints straight from the freezer without any fuss, as long as you remember the temper step. Most nights I forget and it’s still fine.
Storage and Meal Prep
Once processed, return the lid to the pint container and put it straight back in the freezer. This ninja creami vanilla ice cream recipe keeps well for up to two weeks. After that, the texture can get a bit icier on re-spin, probably because the small amount of sugar isn’t enough to completely prevent ice crystal growth over longer storage.
If you’re making a batch ahead, mix and pour multiple containers and freeze them all at once. Each one needs its own 24-hour freeze, but if you stagger the start times you can have a fresh pint ready every day or two.
To re-serve from frozen storage, always let it temper for 5 minutes, then run a Re-spin cycle before scooping. Takes 3 minutes and brings it back to nearly the same texture as fresh.
A Note on the Base
This ninja creami vanilla ice cream recipe keeps things simple by design. Coconut cream brings fat and body. Greek yoghurt adds protein and a slight tang that balances the sweetness. Raw caster sugar lowers the freezing point enough to give a scoopable result rather than a solid block. Real vanilla does the rest.
According to USDA FoodData Central, full-fat coconut cream contains roughly 24g of fat per 100ml, which is what gives this ninja creami vanilla ice cream recipe its texture without needing egg yolks or cream. The yoghurt contributes protein that helps the CREAMi blade work through the frozen base more evenly. Compared to a traditional custard-based vanilla ice cream, this version skips the stove entirely and still delivers a properly creamy result.
What Goes Wrong and Why
Grainy or icy texture after spinning: Almost always means the base froze unevenly or the container wasn’t level. Run one Re-spin. If it’s still grainy in this ninja creami vanilla ice cream recipe, the sugar was probably under-dissolved before freezing. Whisk the base for longer next time.
Machine sounds like it’s struggling: The base is too cold. Let the container sit for another 5 minutes, then try again. Running the machine under strain doesn’t help the texture and risks wear on the blade mechanism.
Flavour tastes flat or dull: Usually a vanilla quality issue. If you used imitation vanilla extract or a very old bottle of paste, the flavour won’t carry through freezing well. Real vanilla bean or a fresh bottle of quality paste makes a significant difference in any ninja creami vanilla ice cream recipe.
FAQ about ninja creami vanilla ice cream
Can I use light coconut cream in this ninja creami vanilla ice cream recipe?
I wouldn’t. Lite coconut cream has a much lower fat content, usually around 5-7% compared to 20-24% in full-fat, and the result is noticeably icier and thinner after processing. It works in smoothie bowls but not in a vanilla ice cream base where texture is the whole point.
How long does this ninja creami vanilla ice cream recipe take from start to finish, and is most of that time active or passive?
The total time is about 24 hours and 15 minutes, but almost all of it is passive freezing time. Mixing the base takes maybe 5 minutes, pouring and levelling is another 2 minutes, and processing in the CREAMi runs about 2 minutes plus a possible 2-minute Re-spin. You’re probably looking at 12-15 minutes of actual hands-on time. I usually mix mine before bed so it’s ready to process the following evening without thinking about it.
Can I make this ninja creami vanilla ice cream recipe without a Ninja CREAMi machine, and if so, what adjustments would I need to make to the base or process to get a similar creamy result using a standard home freezer and no specialist equipment at all?
Technically yes, but the result is quite different. Without the CREAMi’s blade mechanism, you’d need to churn the base in a traditional ice cream machine or use the no-churn method, which usually means folding whipped cream into a condensed milk base. This ninja creami vanilla ice cream recipe as written, with coconut cream and yoghurt, isn’t designed for no-churn and would freeze solid without processing. If you don’t have a CREAMi, I’d suggest looking at a proper no-churn recipe that starts with whipped cream as its base. The CREAMi is genuinely the right tool for this particular formula.

Ninja Creami Vanilla Ice Cream Recipe
Ingredients
Equipment
Method
- Combine coconut cream, Greek yoghurt, caster sugar, and vanilla in a jug or bowl. Whisk until the sugar has fully dissolved, about 90 seconds. It doesn’t need to be aerated, just smooth and even.

- Pour the mixture into your Ninja CREAMi pint container up to the max fill line. Do not overfill. Use a spoon to level the surface flat. This matters for even freezing.
- Seal the lid and place the container on a flat shelf in the freezer. Leave it undisturbed for a full 24 hours. Trying to rush this step with 12 hours gives you an icy, grainy result.
- Remove the container from the freezer and let it sit on the bench for 5 minutes to temper slightly. Lock it into the CREAMi outer bowl and process on the Ice Cream function. One full cycle runs about 2 minutes.
- Once done, lift the lid and check. If the surface looks a bit crumbly or uneven, run one Re-spin cycle. Usually one is enough. The texture should be smooth and glossy, almost like soft-serve.
- Serve immediately for a softer consistency, or return the sealed container to the freezer for 30-40 minutes if you want a firmer scoop.
Nutrition
Notes
Tried this recipe?
Let us know how it was!This ninja creami vanilla ice cream recipe earns its place in your regular rotation quickly. Four ingredients, one machine, 24 hours of patience. That’s the whole deal.