Ninja Creami Chocolate Ice Cream: Easy High-Protein Frozen Treat
Make ninja creami chocolate ice cream at home with just 6 ingredients. Dairy-free, high-protein, and ready to spin after a 24-hour freeze. Simple and satisfying.

There’s a specific kind of satisfaction that comes from pulling a pint out of the freezer knowing you made it yourself. Last summer I started making ninja creami chocolate ice cream on a near-weekly rotation, mostly because Sydney heat hits differently in January and I’d rather not spend $12 on a tub from Harris Farm when I can make something I actually like better at home. The first time the machine spun that frozen block into something genuinely creamy and scoopable, I stood at the kitchen bench eating straight from the pint like I had no manners whatsoever. No apologies.
What Makes This Version Worth the Freezer Space
Right, so there are a lot of ninja creami chocolate ice cream recipes floating around, and most of them are either too sweet, too icy, or quietly disappointing. This one hits differently for a few reasons. The base uses full-fat coconut cream blended with a good Dutch-process cocoa, which gives you that deep, almost bitter chocolate flavour that cheap ice cream completely misses. Adding a scoop of chocolate protein powder does two things at once: it thickens the mixture before freezing, which cuts down on iciness, and it bumps the protein content to around 18g per serve, which I’ll admit was not the original goal but turned out to be a happy accident.
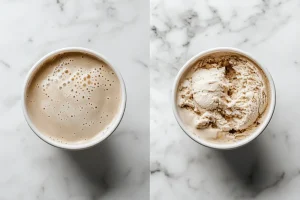
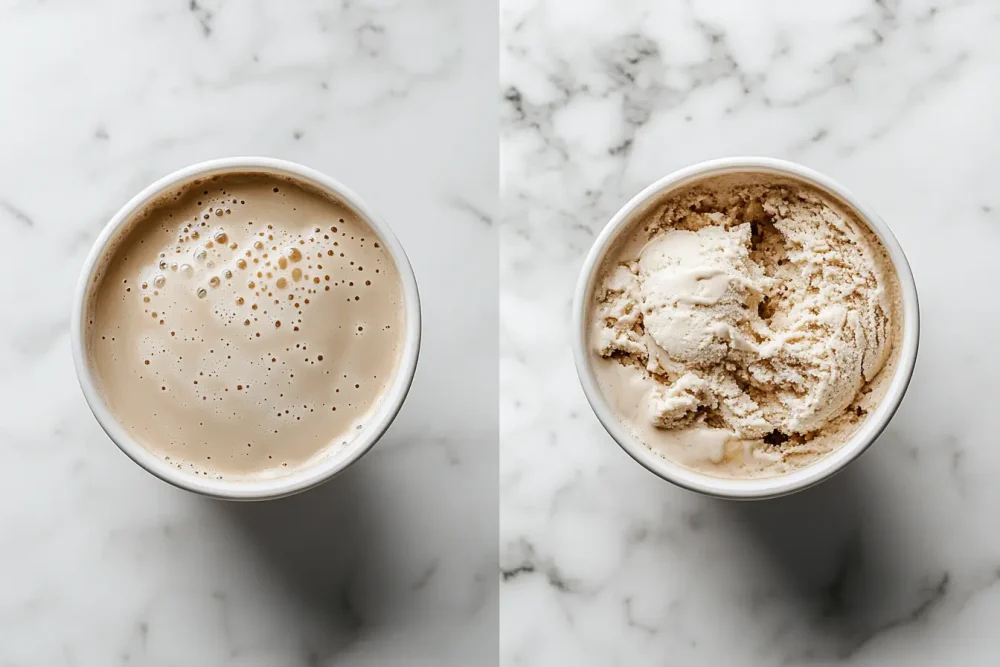
The ninja creami machine is genuinely doing heavy lifting here. You freeze the base solid, then the machine’s re-spin function takes that brick of frozen cocoa cream and processes it into something that has no right being as smooth as it is.
What You’ll Need
The ingredient list for this ninja creami chocolate ice cream is shorter than you’d expect for a result this good. The base is built on full-fat coconut cream, which I almost always have in the pantry – the Ayam brand from Coles works well, and so does the Thai Kitchen variety from Woolworths. You want full-fat here, not the lite stuff. Lite coconut cream freezes rock-hard and re-spins into something grainy, which I learned the expensive way after two failed batches.
For chocolate flavour, Dutch-process cocoa gives a richer, darker result than standard cocoa. The Plaistowe brand is probably my most-used, available in the baking aisle at most Coles and Woolworths. Add a scoop of chocolate protein powder – I’ve had good results with both Bulk Nutrients and vanilla-adjacent blends, though any chocolate whey or plant-based protein works. Sweeten with maple syrup or honey, and round it out with a splash of vanilla extract. That’s genuinely it.
According to the Australian Eggs nutrition and dairy alternatives guidance, using a high-fat dairy-free base can produce a smoother frozen texture than low-fat alternatives, which lines up with exactly what I’ve found in testing.
Ingredients (serves 2-3, fills one 473ml Ninja Creami pint)
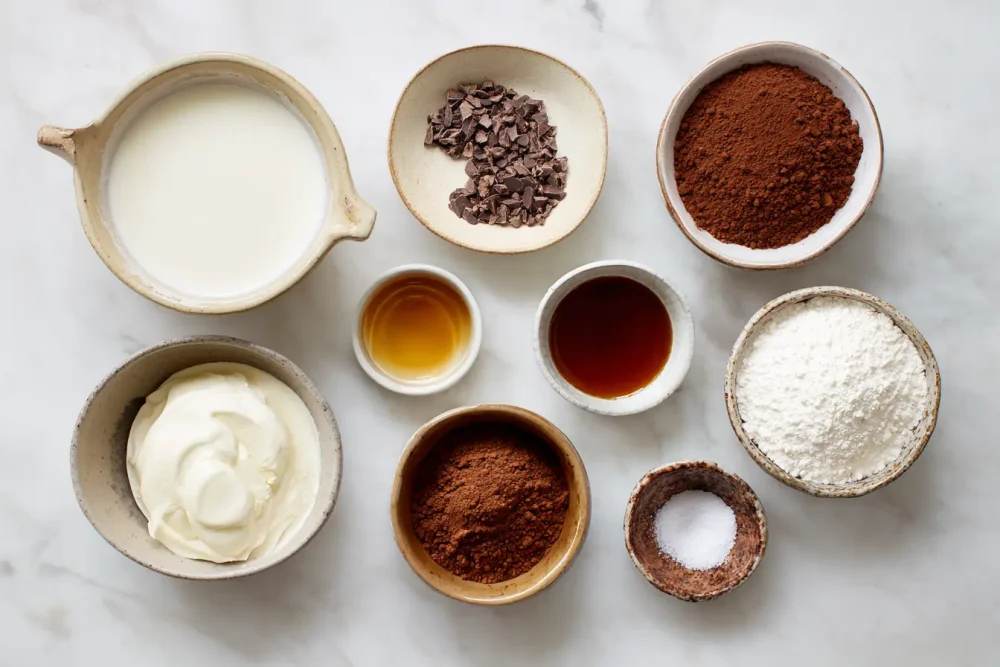
- 400ml full-fat coconut cream (1 standard tin)
- 3 tablespoons Dutch-process cocoa powder (about 22g / 0.8oz)
- 1 scoop (30g / 1oz) chocolate protein powder
- 2 tablespoons maple syrup or honey
- 1 teaspoon vanilla extract
- Pinch of fine salt
For extra richness (optional): 2 tablespoons smooth almond butter stirred through before freezing.
How to Make It
1. Blend the base
Combine coconut cream, cocoa powder, protein powder, maple syrup, vanilla, and salt in a blender or tall jug. Blitz for about 20 seconds until completely smooth. Taste here – the mixture should be slightly sweeter than you want the finished ice cream to be, because freezing dulls sweetness.
2. Pour and freeze
Pour the mixture into your Ninja Creami pint container up to the max fill line. Secure the lid and freeze on a flat surface for a minimum of 24 hours. I usually prep it the night before and leave it a full day, because anything less than 18 hours tends to produce an icy result.
3. Process in the machine
Remove the pint from the freezer. Let it sit on the bench for exactly 5 minutes – not longer, or the outer edge softens too much and the machine can struggle. Lock the pint into the Ninja Creami NC301 (the outer bowl, then the lid assembly), select the Ice Cream function, and let it run.
4. Re-spin if needed
Once the first spin finishes, check the texture. If it looks crumbly or powdery in the centre, add a teaspoon of coconut cream or milk, press it into the middle, then hit Re-spin. Usually one re-spin is enough. Some days, depending on how cold my freezer runs, it comes out smooth on the first pass.
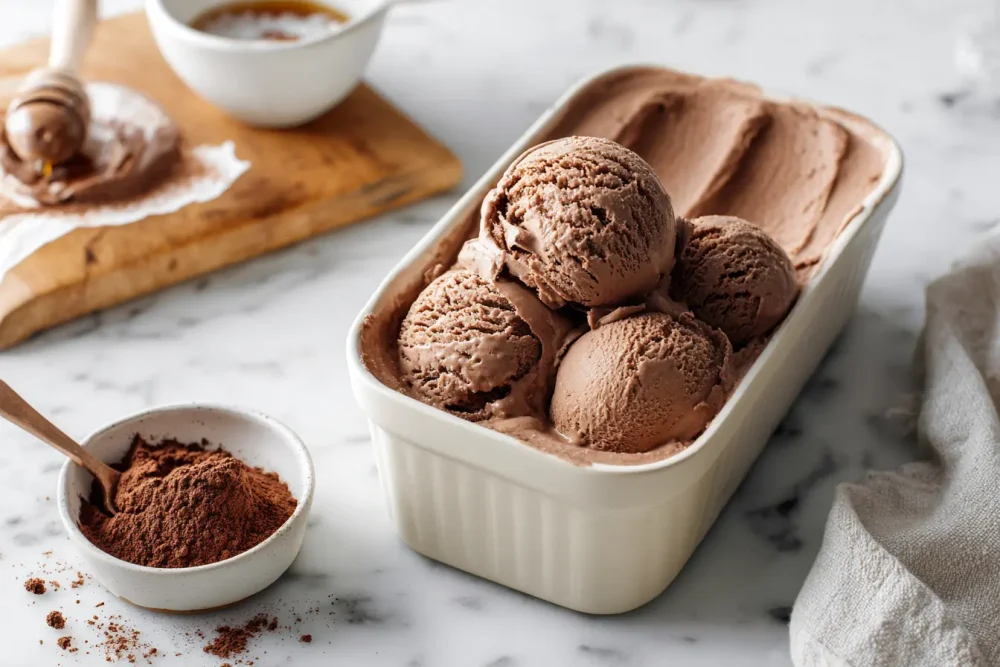
5. Serve or store
Scoop straight from the pint or smooth the top, re-lid, and return to the freezer for up to 5 days.
My First Few Attempts Were, Honestly, a Bit Rough
The first time I made ninja creami chocolate ice cream, I used lite coconut milk because that’s what I had. The machine processed it fine, but the texture was grainy and it re-froze into something closer to a chocolate-flavoured ice block. Batch two I overcorrected and added too much protein powder – probably 60g – which made the base so thick it barely blended, and the finished ice cream had a chalky mouthfeel that lingered. Batch three I forgot to let the pint sit before processing and the machine made a sound I’d rather not repeat. See my banana pudding milkshake for another cold dessert recipe that taught me patience is the whole point.
By batch four I had it sorted. Full-fat coconut cream. One scoop of protein powder, not two. Five minutes of bench rest. The result was smooth enough that my sister, who is sceptical of anything described as “high-protein,” had three scoops and asked for the recipe.
Where I Went Wrong (So You Don’t Have To)
Testing ninja creami chocolate ice cream across about nine batches over two months taught me a lot, mostly through failure. The first proper disaster was using canned coconut cream straight from the fridge without shaking it. The fat had separated and settled at the top, so the blended base was streaky and uneven. When it froze and processed, one half of the pint came out smooth and the other was grainy and slightly watery. Lesson: always shake the tin, or better yet, give it a quick stir in a jug before blending.
The second issue took me longer to diagnose. I was freezing the pint on a wire rack inside the freezer because I thought airflow would help. Turns out the base wasn’t sitting flat, so it froze at a slight angle. The Ninja Creami NC301 processes from the bottom up, and an uneven frozen block means the blade hits some sections harder than others. Flat surface in the freezer. That’s the whole fix.
Third failed attempt: I added frozen raspberries to the base before freezing because I wanted a chocolate-raspberry version. The fruit released water during freezing and created icy pockets throughout. The mix-in function exists for exactly this reason – you add fruits, chunks, or swirls after the first spin, not before. I know that now.
Tips That Actually Make a Difference
Taste the base before it freezes. When you’re making ninja creami chocolate ice cream, the mixture should taste noticeably sweeter than you want the finished product to be. Cold temperatures suppress sweetness, so what seems like too much maple syrup at room temperature will taste just right once frozen and spun.
Don’t skip the salt. A pinch of fine salt in the base sounds minor, but it sharpens the chocolate flavour in a way that’s hard to explain until you taste a batch with and without. I’d say this is probably the most underrated step in the whole recipe.
Let the pint temper properly. Five minutes on the bench before processing is the sweet spot for most home freezers running around -18°C. If yours runs colder – some chest freezers go to -23°C or lower – give it 7 minutes. Running the machine on a fully frozen pint without tempering puts unnecessary strain on the motor, and I’ve learned that lesson more than once.
The re-spin is your friend. A crumbly, powdery result after the first Ice Cream cycle isn’t a failure. Add a teaspoon of coconut cream to the centre, press it in slightly, and hit Re-spin. Most ninja creami chocolate ice cream batches come out right after that second pass.
Use a kitchen scale for the cocoa. Three tablespoons sounds simple, but cocoa is light and airy – a loosely spooned tablespoon and a packed one can differ by 4 or 5 grams. Weighing it at 22g gives a consistent result every time. I use a basic Aldi kitchen scale that cost about $12 and it earns its place on the bench.
Variations Worth Trying
Chocolate peanut butter. Stir 2 tablespoons of smooth peanut butter into the base before freezing. The fat content makes the finished ninja creami chocolate ice cream noticeably creamier, and the flavour combination is one I keep coming back to. Almond butter works too, though it’s a bit milder.
Mexican chocolate. Add half a teaspoon of ground cinnamon and a tiny pinch of cayenne (around 0.5g) to the base. The spice doesn’t make it taste hot – it just adds a warmth that sits underneath the chocolate and makes this ninja creami chocolate ice cream feel more interesting. Check out the one pot brownies recipe if you want that same kind of deep chocolate hit in baked form.
Mint choc chip. Swap vanilla extract for peppermint extract (use half a teaspoon, not a full one – it’s strong), then use the Mix-In function to fold through roughly 40g of dark chocolate chips after the first spin. This ninja creami chocolate ice cream variation is a crowd-pleaser on school-holiday afternoons.
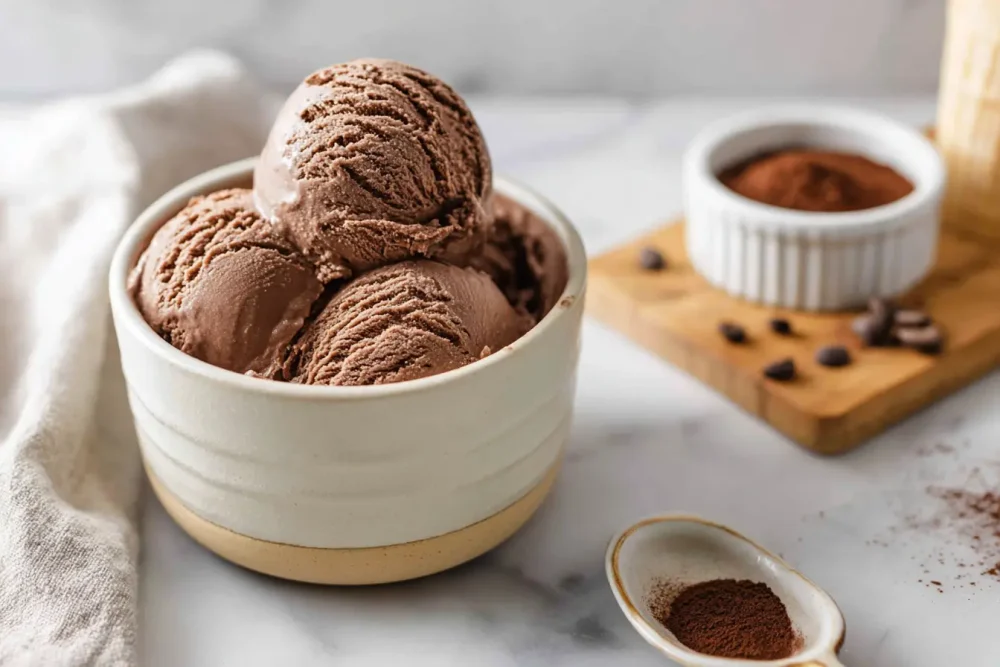
How to Serve It
Ninja creami chocolate ice cream scoops cleanly straight from the pint, which makes serving pretty low-fuss. In summer I usually serve it in a chilled bowl with toasted coconut flakes and a small drizzle of honey. If you want something more substantial, scoop it over a warm brownie a la mode – the contrast between hot and cold is the whole point. For a more casual afternoon, straight from the pint with a teaspoon works fine. No judgement.
It also works well as a thickshake base. Add a scoop to a jug with 150ml of cold oat milk, blend briefly, and you’ve got something closer to a proper milkshake than most cafe versions. My nephews request this almost every time they visit, and I’m more than happy to oblige since the ninja creami chocolate ice cream is already sitting in the freezer waiting.
How I’ve Been Using It Lately
Most Sunday afternoons I prep two or three pints of ninja creami chocolate ice cream at once – different variations, same base method. They stack in the freezer and mean dessert is sorted through the week without any effort on a Tuesday night. It’s become a background habit, the way some people batch-cook rice on Sundays. I also take a pint to my sister’s place when I’m going for dinner. She’s stopped being sceptical of anything high-protein and now just asks when the next batch of ninja creami chocolate ice cream is ready.
Storage and Meal Prep Notes
The finished ninja creami chocolate ice cream keeps well in the pint container with the lid on for up to 5 days in the freezer. After that, ice crystals start forming and the texture after re-spinning becomes grainier. If you’re making it more than a day ahead, the re-spin function brings it back to a scoopable consistency – add a teaspoon of liquid to the centre before re-spinning if it’s been in there more than 3 days.
You can prep the base up to 48 hours before freezing and keep it in the fridge in a sealed jug. Give it a quick stir before pouring into the pint, since the cocoa can settle slightly. I often blend a double batch on a Saturday, fill two pints, and freeze both at once. If you enjoy making cottage cheese chocolate mousse as well, the freezer prep routine is similar enough that you can do both on the same afternoon.
What’s Actually in This
A standard serve of ninja creami chocolate ice cream (roughly one-third of a pint, or about 157ml) contains around 18g of protein from the combined protein powder and coconut cream, with fat mostly from the coconut cream base. Dutch-process cocoa contributes a small amount of iron and magnesium – probably not the main reason anyone’s making ice cream, but worth knowing if you use it often in baking too. The USDA FoodData Central database lists Dutch-process cocoa as containing around 13mg of iron per 100g, which is a meaningful figure if cocoa is a regular pantry staple.
The coconut cream base means this ninja creami chocolate ice cream is naturally dairy-free, which makes it useful when cooking for mixed groups. A coconut cream base generally re-spins into a slightly softer result than a milk-based base, but the difference is minor once the machine does its job.
Common Mistakes to Avoid
Using lite coconut cream. It’s the most common reason ninja creami chocolate ice cream batches fail. Lite versions have a higher water content, which means more ice crystals and a grainier texture after processing. Full-fat only, every time.
Over-filling the pint. The max fill line on the Ninja Creami pint exists for a reason. Go above it and the mixture can expand during freezing, making it impossible to lock the pint into the machine properly. The lid assembly won’t close and you’re stuck defrosting a pint you can’t process.
Processing straight from the freezer. If the outer edges don’t give at all when you press them, the machine will struggle and the ninja creami chocolate ice cream texture suffers for it. Five to seven minutes of bench rest is the step that makes everything else work.
FAQ
Can I make ninja creami chocolate ice cream without protein powder?
Yes. Leave it out and replace it with 2 tablespoons of almond butter or an extra tablespoon of cocoa. The protein powder mainly helps with texture and thickness before freezing, so adding a little fat compensates well. The result is still good.
My ninja creami chocolate ice cream came out crumbly and dry after the first spin – is the batch ruined?
Not at all. This is a normal result, especially if your freezer runs colder than average or if the pint didn’t get quite enough bench rest before processing. Add a teaspoon of coconut cream or oat milk to the centre of the crumbly section, press it in lightly with a spoon, then select the Re-spin function. Almost always one re-spin brings the ninja creami chocolate ice cream back to the smooth, creamy texture you’re after. If it’s still not there after two re-spins, the pint probably needs another minute at room temperature before trying again.
How long does it take to make ninja creami chocolate ice cream from scratch, including freeze time, and can I speed up the freezing step?
The hands-on prep is about 5 minutes of blending. The freeze time is the long part – a minimum of 18 hours and ideally a full 24 hours. I’ve tried shortcuts: setting the freezer to its coldest setting, pre-freezing the base in a shallow container before transferring to the pint, even placing the pint surrounded by ice packs. None of it meaningfully cuts the time without affecting texture. The 24-hour freeze is genuinely the step you can’t rush when making ninja creami chocolate ice cream, so the most practical approach is to plan a day ahead. Prep it before bed and it’s ready the following evening.
Honestly, this ninja creami chocolate ice cream is one of those recipes I keep coming back to because the effort-to-payoff ratio is hard to beat. Once you’ve done it a couple of times, the whole process takes five minutes of actual work. The freezer does the rest.
Ninja Creami Chocolate Ice Cream
Ingredients
Equipment
Method
- Combine coconut cream, cocoa powder, protein powder, maple syrup, vanilla extract, and salt in a blender or tall jug. Blend for about 20 seconds until completely smooth. Taste and adjust sweetness if needed.

- Pour the mixture into a Ninja Creami pint container up to the max fill line. Secure the lid and freeze on a flat surface for at least 24 hours.
- Remove the pint from the freezer and let it sit at room temperature for 5 minutes. Install the pint in the Ninja Creami machine and run the Ice Cream program.
- Check the texture after processing. If the center appears crumbly or powdery, add 1 teaspoon coconut cream or milk and run the Re-spin function.
- Scoop and serve immediately, or smooth the surface, replace the lid, and return the pint to the freezer for up to 5 days.